NginX: Load Balancing, Failover, and Geo Location (Part 3)

NginX: Load Balancing, Failover, and Geo Location (Part 3)

Okay we continue to the third part of this post title, on the previous part we use NginX as load balancer and failover, now we use NginX with Geo IP based to determine the best backend for the visitors to put, here is the illustration.

For instance, we have two backend servers located in UK and DE, then we put the visitors from United Kingdom to the UK backend, visitors from Germany to DE backend, and the rest will be divided into those two backend servers, let’s deal with it.

I assume you have installed NginX in your frontend and two backend servers, you can check the previous post for NginX installation. This GeoIP based location needs GeoIP database for the frontend server to determine where to put the visitor, so first we download and extract Lite version of GeoIP database from Maxmind with geo2nginx.pl script from http://markmaunder.com.

wget https://serversreview.net/pkgs/txt/geo2nginx.pl
chmod 755 geo2nginx.pl
wget http://geolite.maxmind.com/download/geoip/database/GeoIPCountryCSV.zip
unzip GeoIPCountryCSV.zip
./geo2nginx.pl < GeoIPCountryWhois.csv > geo.conf
mv geo.conf /etc/nginx/

GeoIP database has been added to NginX directory, now to the configuration, here is the example of main configuration

(more…)

{ 0 comments }

NginX: Load Balancing, Failover, and Geo Location (Part 2)

NginX: Load Balancing, Failover, and Geo Location (Part 2)

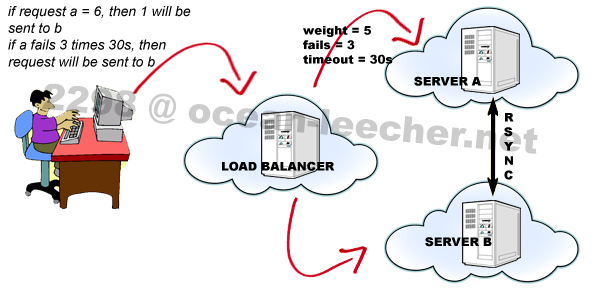
On the previous post we were talking about simple dns failover using two nameservers / ip addresses, now we will move the conversation to the more exciting one, we will use frontend server to control the backend servers, here is the illustration.

One frontend server decides whether to put the visitor to the server A or server B, here i am using NginX as frontend and also NginX as backend server.

Why don’t you use another web server as the backend?

I like NginX, for me it is easy to understand NginX configuration than another web server. Before we start to configure it, install NginX on the frontend and backend servers. I’m using CentOS 5 by the way.

wget http://pkgs.serversreview.net/files/nginx-1.1.13.tar.gz
tar -zxvf nginx-1.1.13.tar.gz
cd nginx-1.1.13
useradd www
passwd www
./configure --prefix=/usr --sbin-path=/usr/sbin/nginx --conf-path=/etc/nginx/nginx.conf --error-log-path=/var/log/nginx/error.log --pid-path=/var/run/nginx/nginx.pid --lock-path=/var/lock/nginx.lock --http-log-path=/var/log/nginx/access.log --http-client-body-temp-path=/var/tmp/nginx/client/ --http-proxy-temp-path=/var/tmp/nginx/proxy/ --http-fastcgi-temp-path=/var/tmp/nginx/fcgi/  --user=www --group=www --with-http_ssl_module --with-http_flv_module --with-http_mp4_module --with-http_gzip_static_module --with-http_realip_module --with-http_addition_module --with-http_xslt_module --with-http_image_filter_module --with-http_geoip_module --with-http_sub_module --with-http_dav_module --with-http_flv_module --with-http_random_index_module --with-http_secure_link_module --with-http_degradation_module --with-http_stub_status_module --with-http_perl_module --with-mail --with-file-aio --with-mail_ssl_module --with-ipv6
make
make install

in the configurations above, as usual i am using “www” user and group for NginX. Next download NginX init script and make it executable.

(more…)

{ 0 comments }

Installing FFMPEG & FFMPEG-PHP from source

Installing FFMPEG & FFMPEG-PHP from source

This thing’s quite confusing me when i was trying to install FFMPEG and FFMPEG-PHP extension. You know it was always very easy if you’re install it from yum or rpm, but CentOS even EPEL doesn’t provide FFMPEG in their repository, so it is a bit bothering me if i had to use repository other than CentOS or EPEL, and that’s why i’m trying to install it from source. I was googling and found a lot of ‘how to’ about this, but they didn’t give a complete tutorial, also when there’s an error in dependency, i had to googling again until i found the solution. I had succeeded installing FFMPEG and FFMPEG-PHP extension both on 32bit / 64bit CentOS 5.6 and Ubuntu 10.10 Maverick, here’s the tutorial and the errors with solutions during the process of me installing FFMPEG.

I assume that your box is already installed with PHP, here as the example i’m using preinstalled NginX, MySQL, PHP from NginX Auto Installer without FFMPEG. First we’re going to install codecs and dependencies, after that FFMPEG and FFMPEG-PHP.

note:
Lib directory CentOS 32bit is /usr/lib
Lib directory CentOS 64bit is /usr/lib64
Lib directory Ubuntu 32bit and 64bit is /usr/lib64

YASM

wget http://pkgs.serversreview.net/files/yasm-1.1.0.tar.gz
tar -zxvf yasm-1.1.0.tar.gz
cd yasm-1.1.0
./configure --prefix=/usr --libdir=/usr/lib
make
make install

(more…)

{ 0 comments }

Setting Nameserver Based For Domain

Setting Nameserver Based For Domain

Yesterday, i was looking for the way to configure nameserver in my vps, because ip based for domain name is not cool, especially if someone check my domain and it appears that my domain only using ip address or public dns, lol. Then i found out that if i want to use nameserver, i have to install and configure bind dns in my vps, so i installed bind dns and ji-o-gling about the configuration, configure this-that-here-there, and the result was failed!!! It doesn’t work hahaha… I really don’t know how to configure it, i’ve never installed and configure bind directly from source because usually i used control panel like cPanel or Direct Admin or Kloxo which has included nameserver setting. Amid confusion, i do forum-walking and found a topic about create nameserver, but they didn’t write about the tutorial, they only told that bind dns can be configured from webmin. Aha!!! I remember that there is nameserver configuration in webmin bind dns, let’s rock n roll!

Box: CentOS 5.5, 256MB memory, OpenVZ

First thing you have to do is registering your nameserver(s) in your domain registrar, usually one domain or website has two nameservers, create ns1.yourdomain.com and ns2.yourdomain.com and point both nameservers to your ip address(es)

Install Webmin using rpm

wget https://serversreview.net/pkgs/files/webmin-1.530-1.noarch.rpm
rpm -U webmin-1.530-1.noarch.rpm

Install Webmin using yum
create webmin repo for yum

nano /etc/yum.repos.d/webmin.repo

add the following lines

[Webmin]
name=Webmin Distribution Neutral
#baseurl=http://download.webmin.com/download/yum
mirrorlist=http://download.webmin.com/download/yum/mirrorlist
enabled=1

add Webmin GPG key and install Webmin

rpm --import http://www.webmin.com/jcameron-key.asc
yum install webmin

(more…)

{ 0 comments }

This is what happened between Apache, Nginx, and LiteSpeed Free Edition

This is what happened between Apache, Nginx, and LiteSpeed Free Edition

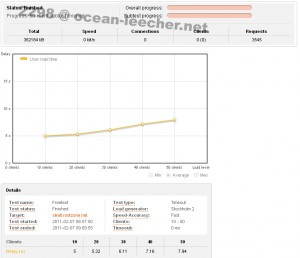
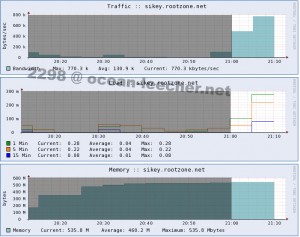
Few weeks ago i rent one box VPS to test resource usage from three different webservers without any tweaks, it is just basic installation with PHP and MySQL. This three webservers are Apache, Nginx, and LiteSpeed Free Edition. I’m using wordpress basic installation (without any plugins) plus one 404KB image and load it with 50 visitors maximum simultaneously. This VPS has 256MB memory (512MB burst) and using CentOS 5.5 32bit with OpenVZ virtualization. Allright here are the results.

Apache

Apache Load Time

Apache Resouce Usage (more…)

{ 0 comments }

Latest Stable Version Nginx 0.8.54 with PHP 5.3.5

Latest Stable Version Nginx 0.8.54 with PHP 5.3.5

This is the improvement of my previous Nginx version 0.8.53 with PHP 5.3.5 installation, and also this time i’m not using php-fpm to run fastcgi, i’m using php-cli command to run fastcgi, and the result is memory usage decreased about 50MB. So let’s get it on!

VPS: CentOS 5.5 32bit with 256MB RAM XEN

Add EPEL and REMI repository, also update YUM (we will use REMI reposity for PHP 5.3.5)
EPEL 32bit

rpm -Uvh http://download.fedora.redhat.com/pub/epel/5/i386/epel-release-5-4.noarch.rpm

EPEL 64bit

rpm -Uvh http://download.fedora.redhat.com/pub/epel/5/x86_64/epel-release-5-4.noarch.rpm

REMI

rpm -Uvh http://rpms.famillecollet.com/enterprise/remi-release-5.rpm
yum -y update

Install Nginx

yum -y install GeoIP GeoIP-devel GeoIP-data perl libperl

32bit

rpm -Uvh http://centos.alt.ru/repository/centos/5/i386/nginx-stable-0.8.54-1.el5.i386.rpm

64bit

rpm -Uvh http://centos.alt.ru/repository/centos/5/x86_64/nginx-stable-0.8.54-1.el5.x86_64.rpm

start Nginx and add to init

/etc/init.d/nginx start
chkconfig --add nginx
chkconfig nginx on

Configure Nginx virtual host
As usual i prefer separate Nginx vhost for each domain so it will be easier to manage, and “/home” directory for domain root so it will ease you to synchronize domain root with ftp user root

create your domain root

mkdir -p /home/domain/public_html
mkdir -p /home/domain/logs

create two directory for domain vhost

mkdir /etc/nginx/sites-available
mkdir /etc/nginx/sites-enabled

edit Nginx configuration (more…)

{ 0 comments }

Ngiiinnxxxx

Ngiiinnxxxx

New update: Nginx 0.8.54 + PHP 5.3.5 has been posted

I’m doing this on my CentOS 5.5 64bit with 256MB RAM OpenVZ VPS, another / my way to install Nginx with the appropriate modul for hosting WordPress site or blog. Nginx version is still 0.8.53 because i’m using Epel Repository.

Download Epel Repository
32bit

rpm -Uvh http://download.fedora.redhat.com/pub/epel/5/i386/epel-release-5-4.noarch.rpm

64bit

rpm -Uvh http://download.fedora.redhat.com/pub/epel/5/x86_64/epel-release-5-4.noarch.rpm

Update YUM

yum update

Install Nginx and required packages

yum install -y nginx patch libtool libmcrypt-devel libxml2-devel make automake gcc gcc-c++ sudo flex bison wget zlib-devel openssl-devel pcre pcre-devel pcre-devel gd-devel bzip2* libc-client-devel.x86_64

Start Nginx

chkconfig --add nginx
chkconfig nginx on
/etc/init.d/nginx start

Optional: Before starting Nginx, you have to stop and / or remove httpd

service httpd stop
yum remove -y httpd

Install MySQL

yum install -y mysql mysql-server mysql-devel
service mysqld start

(more…)

{ 0 comments }