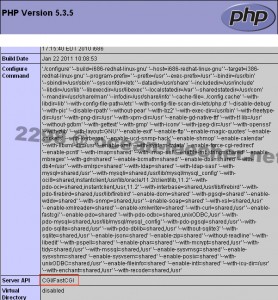
This is the improvement of my previous Nginx version 0.8.53 with PHP 5.3.5 installation, and also this time i’m not using php-fpm to run fastcgi, i’m using php-cli command to run fastcgi, and the result is memory usage decreased about 50MB. So let’s get it on!
VPS: CentOS 5.5 32bit with 256MB RAM XEN
Add EPEL and REMI repository, also update YUM (we will use REMI reposity for PHP 5.3.5)
EPEL 32bit
rpm -Uvh http://download.fedora.redhat.com/pub/epel/5/i386/epel-release-5-4.noarch.rpm
EPEL 64bit
rpm -Uvh http://download.fedora.redhat.com/pub/epel/5/x86_64/epel-release-5-4.noarch.rpm
REMI
rpm -Uvh http://rpms.famillecollet.com/enterprise/remi-release-5.rpm
yum -y update
Install Nginx
yum -y install GeoIP GeoIP-devel GeoIP-data perl libperl
32bit
rpm -Uvh http://centos.alt.ru/repository/centos/5/i386/nginx-stable-0.8.54-1.el5.i386.rpm
64bit
rpm -Uvh http://centos.alt.ru/repository/centos/5/x86_64/nginx-stable-0.8.54-1.el5.x86_64.rpm
start Nginx and add to init
/etc/init.d/nginx start
chkconfig --add nginx
chkconfig nginx on
Configure Nginx virtual host
As usual i prefer separate Nginx vhost for each domain so it will be easier to manage, and “/home” directory for domain root so it will ease you to synchronize domain root with ftp user root
create your domain root
mkdir -p /home/domain/public_html
mkdir -p /home/domain/logs
create two directory for domain vhost
mkdir /etc/nginx/sites-available
mkdir /etc/nginx/sites-enabled
edit Nginx configuration
nano /etc/nginx/nginx.conf
add the following lines to your nginx.conf before the last “}” character and save
# Load virtual host configuration files.

include /etc/nginx/sites-enabled/*;
create your domain vhost configuration
nano /etc/nginx/sites-available/domain
add this but remember to edit and refer to your domain root
symlink your domain vhost configuration
cd /etc/nginx/sites-enabled
ln -s /etc/nginx/sites-available/domain
/etc/init.d/nginx restart
Install PHP 5.3.5 and required modules
yum --enablerepo=remi -y install php-cli php php-mcrypt php-devel php-mbstring spawn-fcgi sudo patch libtool libmcrypt-devel libxml2-devel make automake gcc gcc-c++ sudo flex bison wget zlib-devel openssl-devel pcre pcre-devel pcre-devel gd-devel bzip2* libc-client-devel.i386
Add script to start-stop-restart fastcgi
wget https://serversreview.net/pkgs/txt/php-fastcgi
mv php-fastcgi /etc/init.d/
chmod +x /etc/init.d/php-fastcgi
chkconfig --add php-fastcgi
chkconfig php-fastcgi on
Turn off require tty
nano /etc/sudoers
find “Defaults requiretty” and deactivate or give comment (#) in the beginning line, so it will be like this:
#Defaults requiretty
Restart nginx
/etc/init.d/nginx restart
Install MySQL
yum --enablerepo=remi -y install mysql-server php-mysql
/etc/init.d/mysql start
for MySQL configuration, you can take a look on my previous post
Start fastcgi
/etc/init.d/php-fastcgi start
Check your PHP and Nginx version
php -v
PHP 5.3.5 (cli) (built: Jan 22 2011 10:11:01)
Copyright (c) 1997-2010 The PHP Group
Zend Engine v2.3.0, Copyright (c) 1998-2010 Zend Technologies
nginx -v
nginx version: nginx/0.8.54
Install Ioncube Loader – eAccelerator – Suhosin
wget https://serversreview.net/pkgs/txt/ion-acel-su.sh
chmod 755 ion-acel-su.sh
./ion-acel-su.sh
Install Ioncube Loader – XCache – Suhosin
wget https://serversreview.net/pkgs/txt/ion-xcac-su.sh
chmod 755 ion-xcac-su.sh
./ion-xcac-su.sh
Install PureFTPD
download and install PureFTPD
wget http://download.pureftpd.org/pure-ftpd/releases/pure-ftpd-1.0.29.tar.gz
tar xvf pure-ftpd-1.0.29.tar.gz
cd pure-ftpd-1.0.29
./configure
make install-strip
echo "/usr/local/sbin/pure-ftpd &" >> /etc/rc.d/rc.local
start PureFTPD
/usr/local/sbin/pure-ftpd &
add user and password for your domain ftp
useradd domain
passwd domain
change owner your domain root
chown -R domain /home/domain
if you want to add user for ftp, i suggest you to create the same ftp username with your domain root folder name, and to manage your domain, use ssh login with your current ftp user (not root) so you don’t have to re-change-owner after add or edit some file.
Install phpMyAdmin
download and unpack phpMyAdmin
wget https://serversreview.net/pkgs/files/phpmyadmin.zip
unzip phpmyadmin.zip
move phpMyAdmin directory to your domain directory
mv phpmyadmin /home/domain/public_html
chown -R nginx:nginx /var/lib/php/session
create phpMyAdmin pma database table
cd /home/domain/public_html/phpmyadmin/scripts
mysql -u root -p(yourmysqlrootpassword) < create_tables.sql
mysql -u root -p(yourmysqlrootpassword) < upgrade_tables_mysql_4_1_2+.sql
create and grant phpMyAdmin user to MySQL
mysql -u root -p(yourmysqlrootpassword)
CREATE USER 'phpmyadmin'@'localhost' IDENTIFIED BY 'pmapass';
GRANT SELECT, INSERT, UPDATE, DELETE ON phpmyadmin.* TO 'phpmyadmin'@'localhost';
note:
phpmyadmin = user
pmapass = password
you can change both of them but don’t forget to edit and adjust your phpMyAdmin pmadb setting in “config.inc.php”
if you’re using Suhosin, please add the following lines after declaring suhosin extension in php.ini
suhosin.request.max_vars=2048

suhosin.post.max_vars=2048

suhosin.request.max_array_index_length=256

suhosin.post.max_array_index_length=256

suhosin.request.max_totalname_length=8192

suhosin.post.max_totalname_length=8192
restart Nginx and PHPFastCGI
/etc/init.d/nginx restart
/etc/init.d/php-fastcgi restart
You can now use phpMyAdmin to manage your database
http://domain.com/phpmyadmin
to prevent somebody from accessing your phpMyAdmin, you may not use “phpmyadmin” or some usual name like that for your phpMyAdmin directory name, also use robots.txt to prevent your phpMyAdmin directory indexed by search engine spider.
cd /home/domain/public_html
nano robots.txt
User-agent: *
Disallow: /phpmyadmin/
Thanks to
– Almighty God for my spirit
– Uncle G for plenty of knowledge
– A few helpful site and countless spam site that i cannot write here all


Very good article :D, may i convert this article to an auto installer package braddda ? 😀
Thank’s mate, you’re welcome to create auto-installer package. Let’s help people to make they work lot easier!
I would love to see this in an auto-installer or maybe add any improvements this has to an already working auto-installer (like for ex the one at ruchirablog.com).
Yes i will post the autoinstaller soon, i’m still waiting for my friend to finish it 😀
If you change the phpmyadmin url to something nobody else would know, don’t put it in your robots.txt file.
yes i know that, somebody may have check our robots.txt, but without robots.txt, is it safe from search engine crawler? i still find out till now
Hi.
Great thanks for the article !
But :
http://serversreview.net/pkgs/txt/php-fastcgi-exec
http://serversreview.net/pkgs/txt/php-fastcgi-init
are broken =(
Can you fix it ?
i’m sorry mate, it has been corrected, thanks.
Hi.
http://serversreview.net/pkgs/txt/php-fastcgi-init – works =)
But http://serversreview.net/pkgs/txt/php-fastcgi-exec still not working =(
hi, i’ve changed the file to php-fastcgi only mate, it doesn’t require “php-fastcgi-init” and “php-fastcgi-exec” files now, only “php-fastcgi” to operate php-cgi which stored in /etc/init.d, please take a look back at the “Add script to start-stop-restart fastcgi” section 😀