New update: Nginx 0.8.54 + PHP 5.3.5 has been posted
I’m doing this on my CentOS 5.5 64bit with 256MB RAM OpenVZ VPS, another / my way to install Nginx with the appropriate modul for hosting WordPress site or blog. Nginx version is still 0.8.53 because i’m using Epel Repository.
Download Epel Repository
32bit
rpm -Uvh http://download.fedora.redhat.com/pub/epel/5/i386/epel-release-5-4.noarch.rpm
64bit
rpm -Uvh http://download.fedora.redhat.com/pub/epel/5/x86_64/epel-release-5-4.noarch.rpm
Update YUM
yum update
Install Nginx and required packages
yum install -y nginx patch libtool libmcrypt-devel libxml2-devel make automake gcc gcc-c++ sudo flex bison wget zlib-devel openssl-devel pcre pcre-devel pcre-devel gd-devel bzip2* libc-client-devel.x86_64
Start Nginx
chkconfig --add nginx
chkconfig nginx on
/etc/init.d/nginx start
Optional: Before starting Nginx, you have to stop and / or remove httpd
service httpd stop
yum remove -y httpd
Install MySQL
yum install -y mysql mysql-server mysql-devel
service mysqld start
mysql_secure_installation
Enter current password ==> just press enter since this is the fresh installation
Set root password: Y ==> input your new MySQL root password twice
Remove anonymous user: Y
Disallow root login remotely: n
Remove test database and access to it: Y
Reload privilege tables now: Y
Download pre-configured module for PHP 5.3.5
wget http://ftp.gnu.org/gnu/autoconf/autoconf-2.13.tar.gz
tar -zxvf autoconf-2.13.tar.gz
cd autoconf-2.13
./configure
make && make install
Configure and install PHP 5.3.5
cd /root
wget http://us.php.net/get/php-5.3.5.tar.gz/from/us.php.net/mirror
tar -zxvf php-5.3.5.tar.gz
cd php-5.3.5
./buildconf --force
./configure --enable-fpm --enable-cli --with-mcrypt --with-zlib --enable-mbstring --with-openssl --with-mysql --with-mysqli --with-mysql-sock --with-gd --with-zlib --with-jpeg-dir=/usr/lib64 --enable-gd-native-ttf --without-sqlite --disable-pdo --disable-reflection --with-libdir=lib64 --with-xpm-dir=/usr/lib64 --enable-gd-jis-conv --with-freetype-dir=/usr/include/freetype2 --with-ttf=/usr/include/freetype2 --enable-shared –-enable-shmop –-enable-track-vars –-enable-libxml --enable-bcmath --enable-calendar --enable-exif --enable-ftp --enable-gd-native-ttf --enable-magic-quotes --enable-soap --enable-sockets --enable-zip --with-curlwrappers --with-gettext --with-imap --with-imap-ssl=/usr/lib64 --with-kerberos --enable-inline-optimization --with-bz2 --enable-wddx --with-mhash --enable-sysvsem --enable-sysvshm --enable-mbregex
make
make install
Accelerate your PHP with XCache PHP opcode cacher
**if you prefer eAccelerator please refer here
cd /root
wget http://xcache.lighttpd.net/pub/Releases/1.3.1/xcache-1.3.1.tar.gz
tar -zxvf xcache-1.3.1.tar.gz
cd xcache-1.3.1
phpize
./configure --enable-xcache
make
su
make install
Create php.ini and add XCache configuration
nano /usr/local/lib/php.ini
include the following lines to your php.ini
magic_quotes_gpc=0

[xcache-common]

zend_extension = /usr/local/lib/php/extensions/no-debug-non-zts-20090626/xcache.so

[xcache]

xcache.shm_scheme = "mmap"

xcache.size = 64M
Check your PHP Version with XCache installed
php -v
PHP 5.3.5 (cli) (built: Feb 10 2011 12:17:46)
Copyright (c) 1997-2010 The PHP Group
Zend Engine v2.3.0, Copyright (c) 1998-2010 Zend Technologies
with XCache v1.3.1, Copyright (c) 2005-2010, by mOo
PHP-FPM section
mv /usr/local/etc/php-fpm.conf.default /usr/local/etc/php-fpm.conf
nano /usr/local/etc/php-fpm.conf
uncomment the following lines
pm.start_servers = 20

pm.min_spare_servers = 5

pm.max_spare_servers = 35

pm.max_request = 500
for PHP-FPM setting, you can refer to PHP-FPM Wiki
add PHP-FPM to init directory and start it
ln -s /usr/local/sbin/php-fpm /etc/rc.d/init.d/php-fpm
chmod +x /etc/rc.d/init.d/php-fpm
chkconfig --add php-fpm
chkconfig php-fpm on
/etc/init.d/php-fpm start
Configure your domain root **here i prefer ‘/home’ directory for my domain root
mkdir -p /home/domain/public_html
mkdir -p /home/domain/logs
note: for Nginx domain virtual host configuration, you can edit / add to nginx.conf directly by editing it, or use separate vhost configuration for each domain
i’m using separate vhost configuration
mkdir /etc/nginx/sites-available
mkdir /etc/nginx/sites-enabled
edit nginx.conf
nano /etc/nginx/nginx.conf
add the following lines right after the “include /etc/nginx/conf.d/*.conf” line
# Load virtual host configuration files
include /etc/nginx/sites-enabled/*;
create domain vhost configuration
nano /etc/nginx/sites-available/mydomain.com
add this configuration but don’t forget to edit by referring your domain root
symlink your vhost to enabled-sites
cd /etc/nginx/sites-enabled
ln -s /etc/nginx/sites-available/mydomain
service nginx restart
Create php info page
nano /home/domain/public_html/info.php
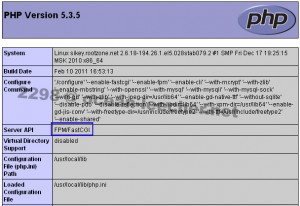
input the following line and test in your browser! (mydomain.com/info.php)
<?php phpinfo(); ?>
Additional Package: IonCube Loader
32bit
wget http://downloads2.ioncube.com/loader_downloads/ioncube_loaders_lin_x86.tar.gz
64bit
wget http://downloads2.ioncube.com/loader_downloads/ioncube_loaders_lin_x86-64.tar.gz
extract IonCube package
tar -zxvf ioncube_loaders_lin_x86-64.tar.gz
move loader-wizard.php to your domain directory, and follow the wizard instructions until finish! (mydomain.com/loader-wizard.php)
mv ioncube/loader-wizard.php /home/domain/public_html
**after you finish installing IonCube Loader by wizard, you can skip here
or
run the following command
mv ioncube/ioncube_loader_lin_5.3.so /usr/local/lib/php/extensions/no-debug-non-zts-20090626/
edit your php.ini
nano /usr/local/lib/php.ini
add the following line before any other zend extension (the line below is one line, not two)
zend_extension = /usr/local/lib/php/extensions/no-debug-non-zts-20090626/ioncube_loader_lin_5.3.so
reboot
Check your PHP Version with IonCube Loader and XCache installed
php -v
PHP 5.3.5 (cli) (built: Feb 10 2011 16:54:48)
Copyright (c) 1997-2010 The PHP Group
Zend Engine v2.3.0, Copyright (c) 1998-2010 Zend Technologies
with the ionCube PHP Loader v4.0.6, Copyright (c) 2002-2011, by ionCube Ltd.
, and
with XCache v1.3.1, Copyright (c) 2005-2010, by mOo
Thanks to
– Almighty God for my spirit
– Uncle G for plenty of knowledge
– A few helpful site and countless spam site that i cannot write here all


[root@215256 php-5.3.5]# ./configure –enable-fastcgi –enable-fpm –enable-cli –with-mcrypt –with-zlib –enable-mbstring –with-openssl –with-mysql –with-mysqli –with-mysql-sock –with-gd –with-zlib –with-jpeg-dir=/usr/lib64 –enable-gd-native-ttf –without-sqlite –disable-pdo –disable-reflection –with-libdir=lib64 –with-xpm-dir=/usr/lib64 –enable-gd-jis-conv –with-freetype-dir=/usr/include/freetype2 –with-ttf=/usr/include/freetype2 –enable-shared .-enable-shmop .-enable-track-vars .-enable-libxml –enable-bcmath –enable-calendar –enable-exif –enable-ftp –enable-gd-native-ttf –enable-magic-quotes –enable-soap –enable-sockets –enable-zip –with-curlwrappers –with-gettext –with-imap –with-imap-ssl=/usr/lib64 –with-kerberos –enable-inline-optimization –with-bz2 –enable-wddx –with-mhash –enable-sysvsem –enable-sysvshm –enable-mbregex
=============================
configure: error: can only configure for one host and one target at a time <~ please help me
post updated. remove –enable-fastcgi from configure. anyway this tutorial is kinda old, you can take a look at the Nginx 0.8.54 tutorial
I think guidance http://serversreview.net/latest-stable-version-nginx-0-8-54-with-php-5-3-5 only vps xen??
OpenVZ too mate, not only XEN